
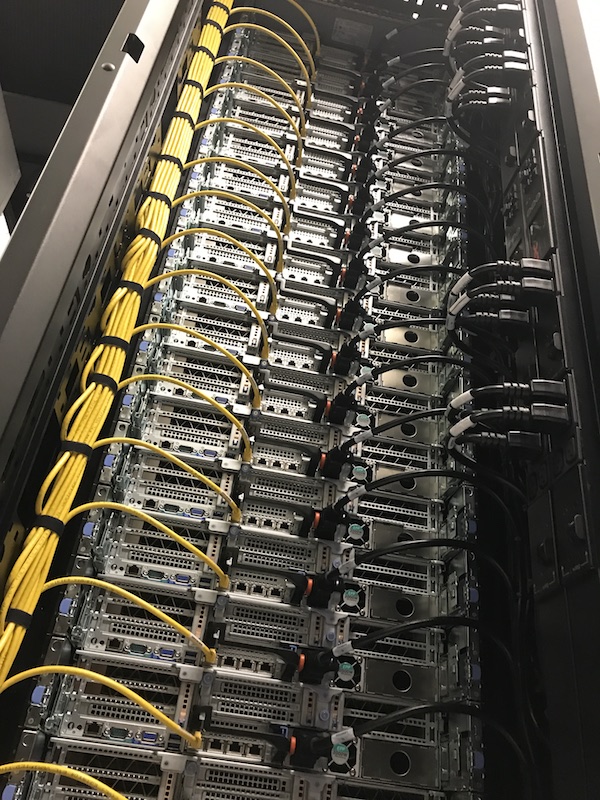
What is a Cluster?
An HPC cluster is a collection of connected computers that can be harnessed to work together.

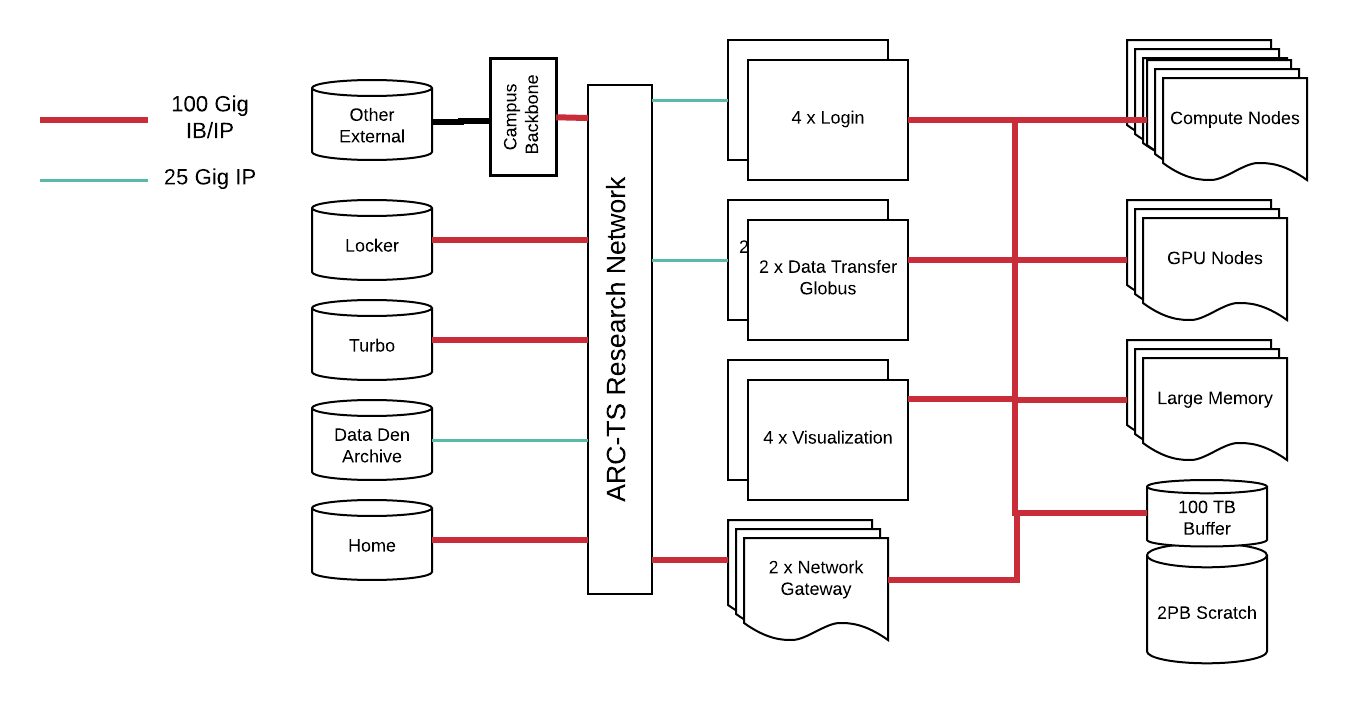
Great Lakes
The Great Lakes cluster is composed of 13,000 cores across 380 nodes, with at least 5 GB of RAM per core. Great Lakes is a batch-oriented system, so compute nodes are intended to allow long-running CPU, memory, or I/O-intensive jobs. Login nodes are used to submit jobs to the batch scheduling system or compile software but may not be used to run jobs. More information about Great Lakes is available on the ARC website.
To use Great Lakes:
- You will need a Great Lakes user login. To apply for one, fill out the login application:
https://arc.umich.edu/login-request - Great Lakes requires multi-factor authentication using Duo. If you haven’t already, you should Enroll in Duo: https://documentation.its.umich.edu/2fa/options-two-factor-authentication
- If you are remotely connecting from off-campus, you will need to use the VPN:
https://its.umich.edu/enterprise/wifi-networks/vpn
Some Nomenclature:
- Cluster: A collection of computers that can do a lot of computing in an organized matter
- Node: one whole compute “box” consisting of a motherboard, CPU, RAM, disk drives, etc. Similar to the computer you are using to log in
- Core/Processor: one individual processor on a CPU chip
- Task: a process on a node, an MPI rank
- Memory: RAM
- Partition: A division of the cluster based on the configuration of the node.
i.e. GPU, Large Memory, Standard - Storage: Disk space where you may write files to.
Logging into the Cluster
Command Line Interface (CLI)
If you have access to a terminal you can ssh to the cluster by using your uniqname and
ssh -X -Y [email protected]
Open OnDemand Interface Login Node (GUI)
After connecting to the campus VPN or from campus, you can point a web browser to:
greatlakes.arc-ts.umich.edu
Now that you have logged into the cluster copy over the directory /sw/coe/centos7/examples/intro-gl to your home directory.
Open OnDemand Starting a Job
The OpenOnDemand instance can also be used to start a job with a GUI
Finding Software
The software on the GreatLakes cluster is managed using LMOD and is organized into a software hierarchy. This means that you will only find software available to you if you load the LMOD modules that the software is based on. We will explore what that means in a bit, but first, let us get used to how LMOD operates.
LMOD allows us to maintain several different versions of software installed all at the same time on the cluster and organizes that software into modules. You then load and unload modules to make the software available for your use.
The LMOD commands you have available are
- module list – to see what you currently have loaded
- module load <module name> – to load a module
- module unload <module name> – to unload a module
- module purge – to unload all currently loaded modules
- module keyword <search term> – to search modules for a keyword to see what might be installed
- module spider <search term> – to search module titles
- module avail <module name> – to see if a module can currently be loaded
LMOD Organization
Previously we mentioned that you can only find software that is available if you load the LMOD modules that the software is based on. For example:
On the cluster, the parallel hdf5 module has been built for both the gcc and intel compilers, and for each of those compilers it has been built for different versions of openmpi, so the phdf5 modules are organized like this
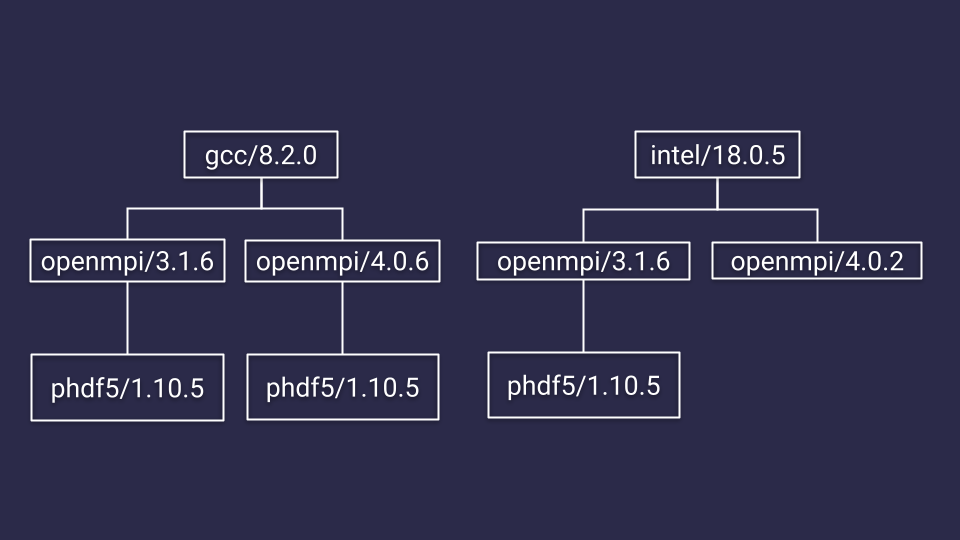
So in order to be able to load any of the phdf5 modules, you’ll have to load the modules preceding it in the hierarchy. So either a module load gcc/8.2.0 openmpi/3.1.6 or module load gcc/8.2.0 openmpi/4.0.6 or module load intel/18.0.5 openmpi/3.1.6. Loading these modules first will finally allow phdf5 to show up in a module avail phdf5. The best way to search for modules then is to use module spider or module keyword.
The output from module spider phdf5 will tell you to look for a specific version.
The output from module spider phdf5/1.10.5 will mention:
You will need to load all module(s) on any one of the lines below before the “phdf5/1.10.5” module is available to load.
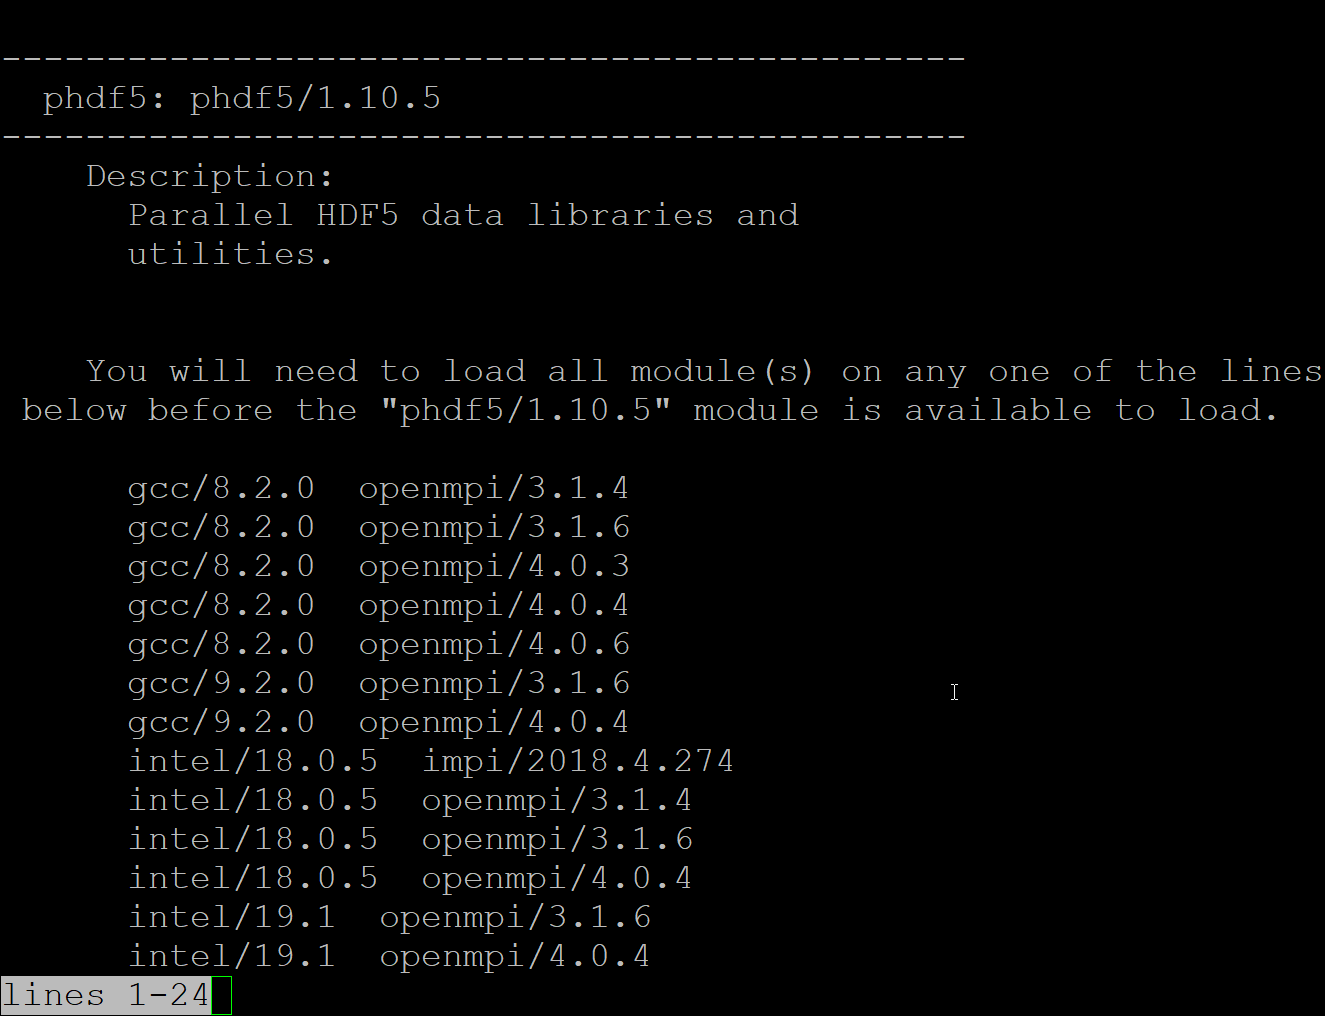
This is where loading any pair of the listed gcc/intel and mpi options will make phdf5 available.
Identifying Resources
You have a couple of utilities available to you which can help you figure out what resources you have access to or have used on the cluster.
- my_accounts – list billable accounts under which you can run jobs
- my_usage – list your total usage for the month in CPU-minutes
- my_job_estimate – get an estimate of how much your job would cost assuming it runs for the entire time you ask it to
- sinfo – get the current status of the partitions in the cluster
- scontrol show node glXXXX – show information on a specific node
Job Submission
The cluster has a job scheduler to which you can submit jobs and let them run while you can log out of the system and the jobs will run once a machine is available to run your job. To set this up you’ll need to set up a Slurm script.
Slurm scripts use an #SBATCH directive for options and take an --flag=value for options.
*Note* there should be no spaces around the = in the options.
Here is an example Slurm script:
*Note* there are changes you need to make to this script to make it work for you.
Particularly the --account option
##### The name of the job
#SBATCH --job-name=JOBNAME
##### When to send e-mail: pick from NONE, BEGIN, END, FAIL, REQUEUE, ALL
#SBATCH --mail-type=END,FAIL
##### Resources for your job
# number of physical nodes
#SBATCH --nodes=1
# number of task per a node (number of CPU-cores per a node)
#SBATCH --ntasks-per-node=1
# memory per a CPU-core
#SBATCH --mem-per-cpu=1000m
##### Maximum amount of time the job will be allowed to run
#####    Recommended formats:  MM:SS, HH:MM:SS, DD-HH:MM
#SBATCH --time=5:00
##### The resource account; who pays
#SBATCH --account=test
########## End of preamble! #########################################
# No need to “cd”. Slurm starts the job in the submission directory.
#####################################################################
# The application(s) to execute along with its input arguments and options:
/bin/hostname
sleep 120
echo “done!”
You would save this script as a file, named simple.sbat for example.
You would then use sbatch simple.sbat to submit this job to the scheduler.
If you needed to submit to the GPU partition you would add these options
#SBATCH --partition=gpu
#SBATCH --gres=gpu:1
There is a job script generator available to help you generate new job scripts.
Job Status and Cancellation
You can check the status of your job with squeue -u $USER
[user@gl-login1 test]$ squeue -u $USER
             JOBID PARTITION     NAME     USER ST       TIME  NODES NODELIST(REASON)
               340  standard  JOBNAME     user PD       0:00      1 (AssocMaxJobsLimit)
               339  standard  JOBNAME     user R        0:04      1 gl3101
               338  standard  JOBNAME     user R        0:08      1 gl3101
ST stands for status or state. The following are common states:
- CA CANCELLED Job was explicitly canceled by the user or system administrator.
- CD COMPLETED Job has terminated all processes on all nodes with an exit code of zero.
- PD PENDING Job is awaiting resource allocation.
- R RUNNING Job currently has an allocation.
S SUSPENDED Job has an allocation, but the execution has been suspended and CPUs have been released for other
You can cancel a job by using scancel <job-number>
Interactive jobs
You can start an interactive job by using the options you would use in a Slurm script on the command line with the salloc command
salloc --account=test --nodes=1 --ntasks-per-node=1 --cpus-per-task=8 --mem-per-cpu=1g --time=8:00:00Open OnDemand/Jupyter on the Cluster
You can start a Jupyter session on the cluster by starting the GUI session mentioned above and then going to the Interactive Apps section of the OOD menu.
Moving Files
There are a variety of ways you can move files onto the cluster.
Globus is an efficient way that allows transfers to resume.
SCP can be used with the transfer nodes on the command line.
To transfer to the cluster with scp you would use:
scp file.name [email protected]rc-ts.umich.edu:/home/uniqname
and to transfer from the cluster you would use
scp [email protected]:/home/uniqname/file.name file.name
Alternatively, you can use the OOD system to move files between the cluster and your local system.
Setting up a venv for use as a kernel in Jupyter
You can set up a venv to use as a kernel in Jupyter but you’ll need to do so in a fashion that plays well with the OOD system. The OOD system requires certain modules and env variables in place so you cannot just start with your own fresh venv and build from there. Instead, it is recommended that you start from the setup in place and build off of that.
Setting up a conda env for use as a kernel in Jupyter
Similarly, you can setup a conda environment to use as a conda environment.